
In this article, you will be getting to know about how to take a screenshot on iPad. On an iPad, snapping a screenshot is as simple as simultaneously pressing two buttons on the device, or you can utilize another onscreen technique. Even though the majority of iPad apps include sharing capabilities, one of the simplest ways to get data off your iPad is to take a screenshot.
It should be noted that although almost any iPad app, including games, allows you to take a screenshot, screenshots taken from premium streaming services like Netflix and Disney+ Hotstar will show a black image instead of a still frame of the movie or TV show you are currently viewing. This is not a bug; for copyright reasons, these apps are made expressly to prevent you from taking screenshots.

- How to take a Screenshot on iPad?

What do you mean by a Screenshot?
A quick and easy way to get the precise content that’s on your device’s screen is to take a screenshot. Rather than using an external camera to take a picture of your device, a screenshot takes a picture of the visual data directly and lets you share or save it with ease. This component is particularly useful for imparting intriguing substance to other people, investigating, and archiving data, in addition to other things.
Taking a screen capture on an iPad is a basic methodology. After taking a screen capture, the image is naturally put away in the “Screenshots” collection of your Photographs library. This coordinated plan makes it more straightforward to recover screen captures and ensures that they are consistently gathered for speedy access. It’s memorable, however, that iPad clients can likewise decide to store screen captures to Records in the wake of altering, giving them significantly more command over put away material.
How to take a Screenshot on iPad if it doesn’t have a home button?
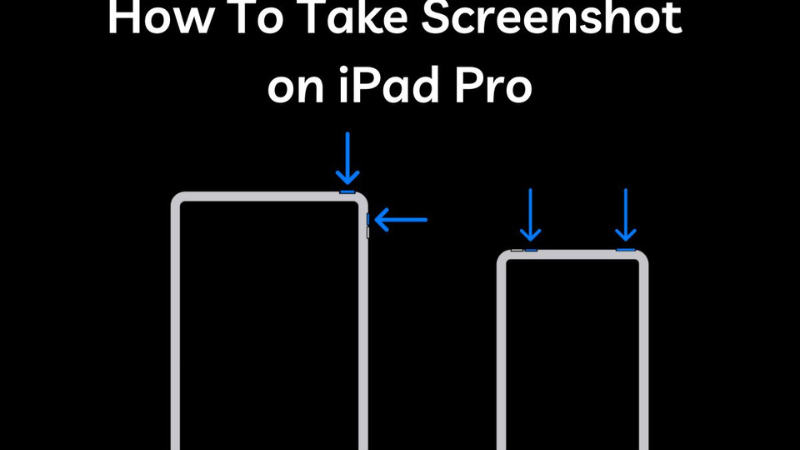
To answer how to take a screenshot on iPad if it doesn’t have a home button is to be contingent upon the iPad model you own, there are slight contrasts during the time spent taking screen captures. On the off chance that your iPad, similar to the iPad Master (2022), iPad Air (2022), iPad small (2021), or iPad (2022), has an edge-to-edge screen and just a side button rather than a front home button, this is the way to take a screen capture. On the off chance that your iPad is inadequate with regards to a home button, you can in any case take a screen capture by following these means:
Step 1:
Check that the substance on your iPad is showing the manner in which you need it to prior to taking a screen capture of it.
Step 2:
Press the top button, which is the upper right button while holding your iPad in representation mode, and one of the volume buttons simultaneously. A short glimmer will happen on your iPad, and in the base left corner of the screen, a thumbnail see of your screen capture will appear. In the event that your iPad isn’t in quiet mode, you’ll hear a shade click sound.
- How to take a Screenshot on iPad if it doesn’t have a home button?
Step 3:
The screen capture’s thumbnail see will disappear shortly, or you can physically excuse it by swiping it off the edge of the screen. The image will be consequently saved to your Photographs application regardless.
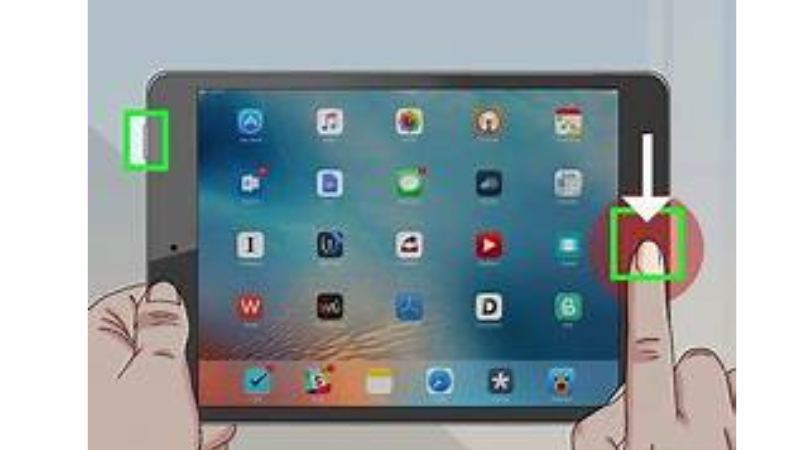
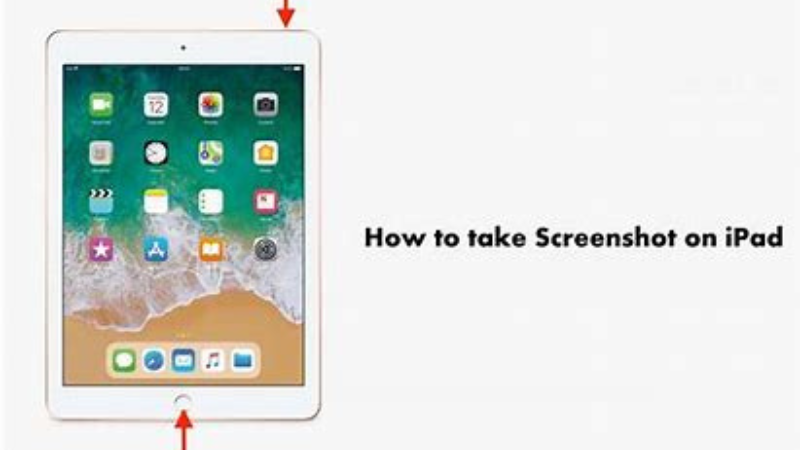
How to take a Screenshot on iPad if it has a home button?
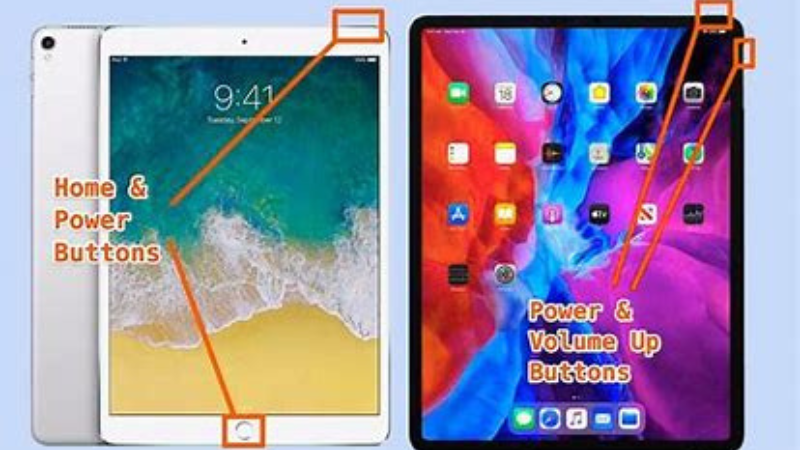
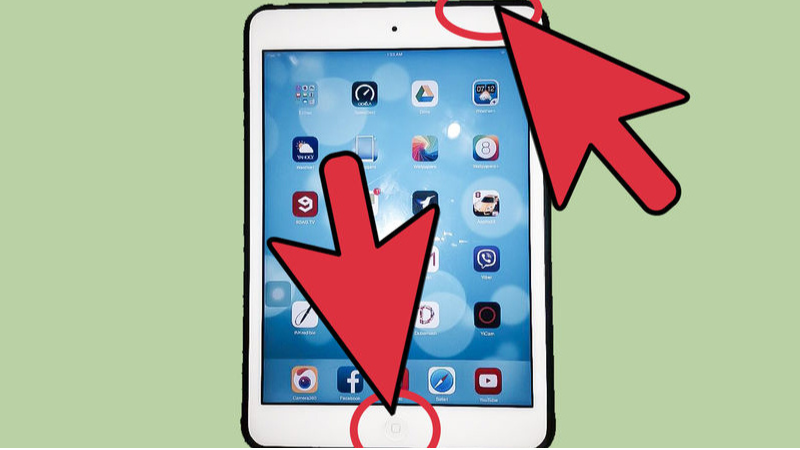
In order to find out how to take a screenshot on iPad if it has a home button is to check if you have a more seasoned iPad model, similar to the iPad (2021), highlighting a home button on the front, taking a screen capture will include utilizing two hands, which might make it more troublesome. On the off chance that your iPad has a home button, follow these moves toward figure out how to take a screen capture:
Step 1:
Check that the substance on your iPad is showing how you need it prior to taking a screen capture of it.
Step 2:
Press the home button and the top button (which is on the top-right edge when holding your iPad in portrait mode) at the same time. This is a two-handed operation, unlike the newer iPads, so be sure to press both at the same time. If you don’t, your iPad might just turn off rather than taking a screenshot.
Your iPad screen will flash and a thumbnail preview of your screenshot will show up in the lower-left corner of the screen after you’ve successfully taken a screenshot. If your iPad isn’t in silent mode, you’ll also hear a shutter-click sound akin to that of a camera as confirmation, just like with the newer iPads.
- How to take a Screenshot on iPad if it has a home button?
Step 3:
To dismiss a screenshot manually, wait for its thumbnail to vanish or swipe it off the screen’s edge. The photo will appear in your photo library within the Photos app.
How to Take a Screenshot on iPad Using Buttons?
if you are still figuring out how to take a screenshot on iPad using button you must know there are two varieties of button combinations for iPad screenshots. Most iPad users use a combination of hardware buttons to take screenshots. The buttons you press vary depending on the kind of iPad you own. The combinations for the same are as follows:
- For iPads lacking a Home button, simultaneously press and hold the Volume Up and Top buttons for a brief moment.
- For iPads that have a home button, simultaneously press and hold the top and home buttons for a brief moment.
- How to Take a Screenshot on iPad Using Buttons?
How to Take a Screenshot on iPad without Buttons?
Do not worry if you don’t know how to take a screenshot on iPad without button. As you know the ability to take screenshots on your device without using the physical buttons is a helpful feature, particularly in cases where buttons might not be accessible or might not be working properly. Here’s how to accomplish this on an iPad, step-by-step:
Enable Assistive Touch:
- On your iPad, open the “Settings” app.
- Select “Accessibility.”
Access Touch Controls:
- Locate “Touch” in the Accessibility menu and tap on it.
- Locate “Assistive Touch” and turn it on.
Customize Top-Level Menu:
- Once Assistive Touch is enabled, a brief menu will show up on the screen. Give it a tap.
- Add “Screenshot” to the top-level menu so that it is easily accessible.
Capture Screenshot:
- After setting up Assistive Touch, you can snap a screenshot without using any buttons.
- Open the content or screen that you wish to record.
- How to Take a Screenshot on iPad without Buttons?
Access Assistive Touch Menu:
- On the screen menu, tap the Assistive Touch icon.
Select “Screenshot”:
- Find “Screenshot” on the Assistive Touch menu and tap on it.
Confirmation and Save:
- A brief flash on the screen will signal that a screenshot has been taken.
- The lower left corner of the screen will display a thumbnail of the screenshot.
- You can save the thumbnail to your Photos library by swiping it off the screen, or you can tap it to access editing options.
Taking screenshots on your iPad is made easy and button-free with this method. For users who might be limited by physical buttons or who would rather use a touch-based interface, the AssistiveTouch feature functions as a virtual button, providing an alternate option. You can expedite the process by personalizing the AssistiveTouch menu, which makes the screenshot function readily available whenever needed.
What Happens Next?
If in case you are wondering what happens next when you take a screenshot on your iPad, here’s what happens- The process of taking screenshots on an iPad is simple, and the device offers easy-to-use tools for organizing and modifying these images. A thumbnail image instantly shows up in the iPad’s lower-left corner when you take a screenshot. This thumbnail provides instant access to editing options and functions as a brief preview. In the event that nothing is done, the screenshot will be saved in the special “Screenshots” album in the Photos app and the thumbnail will automatically vanish.
This default arrangement makes it easier to retrieve screenshots and makes sure they are kept in a convenient place. But clicking on the thumbnail brings up a plethora of options. You may access an edit mode with a number of editing tools and settings by tapping the screenshot thumbnail. This mode allows you to annotate, crop, highlight particular details, and add notes to your screenshot.
This feature is especially helpful for users who want to edit or customize their recorded video before sharing or archiving it. The ability to modify the screenshot and select where to save it adds a level of personalization to the user experience. The iPad’s screenshot functionality meets a wide range of user needs, whether they are for sharing information, taking notes, or quick reference.
You can take as numerous screen captures as you need; the main limitation is how much extra room your iPad brings to the table. You can take and save screen captures as frequently depending on the situation, given that your gadget has sufficient extra room. This makes it an adaptable instrument reasonable for many purposes.
How to take a Screenshot on iPad with an Apple Pencil?
Apple pencil is a very useful tool, you might also want to know how to take a screenshot on iPad with an Apple Pencil. It is much more hard to take a fast screen capture while utilizing your pointer, however you can utilize an Apple Pencil on the off chance that you have one. The guidelines to assist you with taking a screen capture with an Apple pencil are as per the following:
Step 1:
From the lower-left corner of your screen, swipe your Apple Pencil up toward the middle. The Fast Note highlight is gotten to by swiping from the base right corner, while the default position is in the base left corner. You can change this in the Macintosh Pencil > Pencil Signals segment of the iPad Settings application.
Step 2:
A similar glimmer and shade click sound that happens when you utilize the buttons to take a screen capture will likewise be perceptible. In any case, on the off chance that you utilize the Apple Pencil, the altering and comment screen will open right away.
Step 3:
Make any necessary markup or edits to your screenshot.
Step 4:
When you’re done, save your screenshot by choosing Done in the upper-left corner. To share your screenshot the conventional way, you can also use the Share button located in the upper-right corner.
How to edit and annotate a screenshot?
After you get to know how to take a screenshot on iPad, you must know how to edit and annotate it. When a screenshot is successfully taken, a tiny preview appears in the lower-left corner of your screen. This thumbnail can be manually dismissed by swiping it to the left, or it will vanish automatically in a few seconds. In this instance, the screenshot is safely stored in your photo library, allowing you to resume your previous activity. Before then, though, you can also open the screenshot and make a few quick adjustments and annotations. To edit and annotate a screenshot, follow these steps:
Step 1:
After taking a screenshot, select the thumbnail that appears in the bottom-left corner of your screen.
Step 2:
A condensed editing window containing your screenshot will open, ready for cropping and annotation.
Step 3:
You might also notice two additional buttons at the top for screenshots taken from specific supported apps, like Mail or Safari. In this instance, you have the option of selecting Full Page to take a picture of the full article, web page, or email, or Screen to save a standard screenshot that only shows what’s visible on your screen. You can annotate and crop this screenshot just like you would any other, but instead of saving the results to your Photos library, the Files app will save a PDF file.
Step 4:
Use the cropping handles to draw a box around the area of your screenshot that you want to save if you only want to save a portion of it. You can also enlarge a section of your screenshot by using the standard pinch-to-zoom gesture.
Step 5:
You can also use an Apple Pencil or your finger to draw annotations and other markup on your screenshot. The editing screen’s annotations panel has a number of annotation tools and buttons for undoing and redoing edits, allowing you to go back and make any necessary changes.
Step 6:
Advanced annotations can also be added by clicking the Plus button and selecting the relevant options from the pop-up menu that appears. Examples of advanced annotations include a text box, magnifier loupe, and your signature.
Step 7:
Indeed, pick “Done” in the upper left corner whenever you’ve finished altering.
Step 8:
To save the resultant picture to your photograph library or an area in the Records application, select Save to Photographs or Save to Documents. If you’ve altered your perspective and don’t have any desire to save the screen capture, you can likewise decide to Erase it.
How to share a screenshot?
From the editing screen, you can also instantly share a screenshot with any of your contacts. This is an easy way to share information with others, including articles, snippets of text, maps, and directions. It’s also a fun way to show your friends and family what you’re up to. The instructions for sharing a screenshot are as follows:
Step 1:
Choose the thumbnail that shows up in the lower-left corner of your screen after snapping a screenshot.
Step 2:
If you’d like, crop and annotate the screenshot.
Step 3:
In the upper-right corner, click the Share button when you’re ready to share it. The common iPadOS sharing settings show up.
Step 4:
Select an option from the second row to share via an app like Facebook or Mail, or use AirDrop to send to another device, or from the row of icons at the top to quickly share with one of your regular contacts. The standard sharing options for storing your screenshot in Notes and other apps are also available here.
Conclusion
It is pretty easy to figure out how to take a screenshot on iPad. An iPad’s simple yet effective screenshot feature makes it easy for users to share, record, and annotate visual content. The process is simple to use and adaptable, regardless of whether hardware buttons or other techniques like Apple Pencil or AssistiveTouch are used.
The Photos app’s automatic organization of screenshots into the “Screenshots” album improves accessibility, and the ability to edit, annotate, and share increases user customization. The iPad’s screenshot feature serves a wide range of purposes, from creative expression to troubleshooting, and adds to a smooth and effective user experience.